Access DVR Network setting steps
1.
Start DVR, press "menu" button, enter the logon screen, enter the default login password 88888888 into the system menu. As following
2. In the system menu, select "NETWORK", entry into the interface as below, set a static IP, subnet mask, gateway and DNS. Exit menu, save. For example: The parameter settings as below. (Customer must set the IP within its own network segment)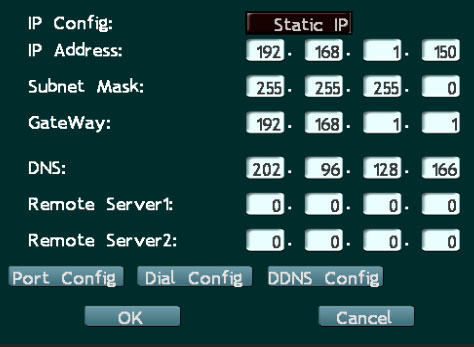
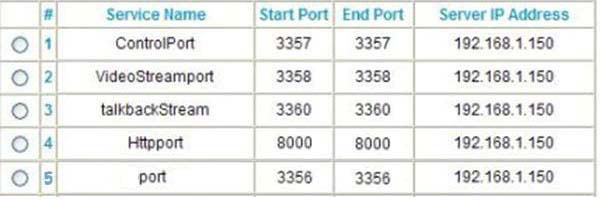
3. Select "Port Config" item, enter the following settings interface, the next figure in the four ports, except "HTTP PORT" need to be changed (for example: Please revise 80 to 8000), the remaining three must use the default values. Then exit menu, save.
4. Access router, except mapping the corresponding ports to the above IP, need to add and map one more port (figure 5 ports), and all put to use.
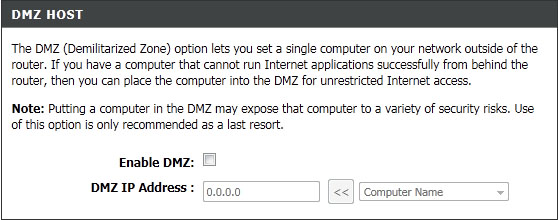
5. Access to the router "forwarding rule" , as shown in Figure 1, and then select the "DMZ host" , first select"DMZ state" as the opening, and change "DMZ Host IP address" to the current DVR's IP address and save. In Figure 2. For example: set to 192.168.1.150
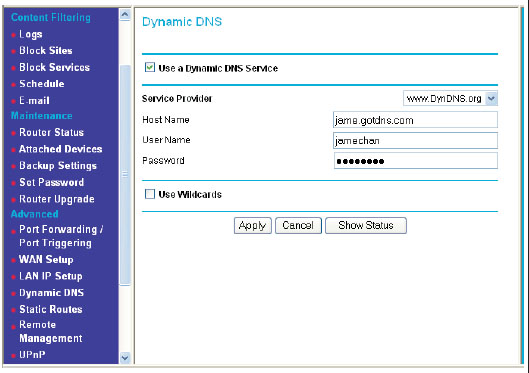
6. Enter into the router DDNS service settings, log DDNS with user name and password, and click to enable this feature. Note: If no DDNS user name, first go to a free DDNS Web site for application. For example, in the next figure, set the "Host Name" to oaby.com, "User Name" is set to longsetest, and Password" is set to ******* , and then click the Apply button.
7. Choose ![]() on the desk, right-click and choose Properties, will come out "Internet Properties" dialog interface, click the "Security" tab, and then click the "Custom security level," open the security settings interface,enable all the "ActiveX controls and plug-in " options, click OK. Shown as below. (Special Note: DVR supports for Windows 2000/2003/XP (Need Microsoft. NET Framework 2.0 or later version installed); Windows vista;)
on the desk, right-click and choose Properties, will come out "Internet Properties" dialog interface, click the "Security" tab, and then click the "Custom security level," open the security settings interface,enable all the "ActiveX controls and plug-in " options, click OK. Shown as below. (Special Note: DVR supports for Windows 2000/2003/XP (Need Microsoft. NET Framework 2.0 or later version installed); Windows vista;)
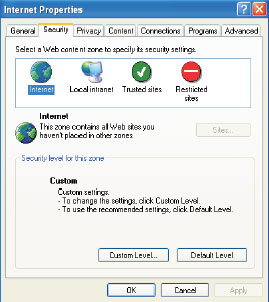
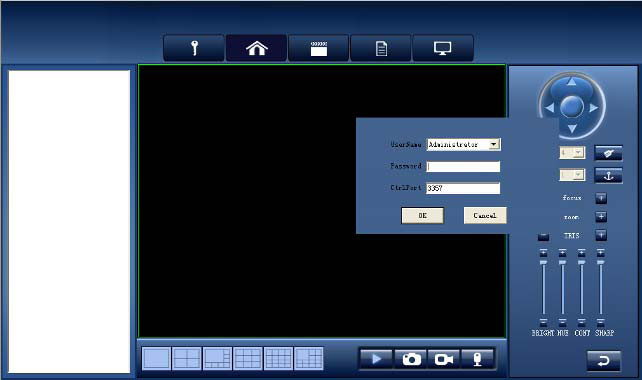
8. Enter http://oaby.com:8000/ in the IE browser, install the plug-in in the system, please choose “allow installation of plug-in”, the system will enter the login screen, as below shown: (Special Note: If you use a DDNS domain name can not be displayed when browsing the web, in order to verify whether the use of DDNS is enabled successfully, you can enter directly in the browser the current DVR static IP address, such as http://192.168.1.150:8000/ and enter, the following steps are the same)
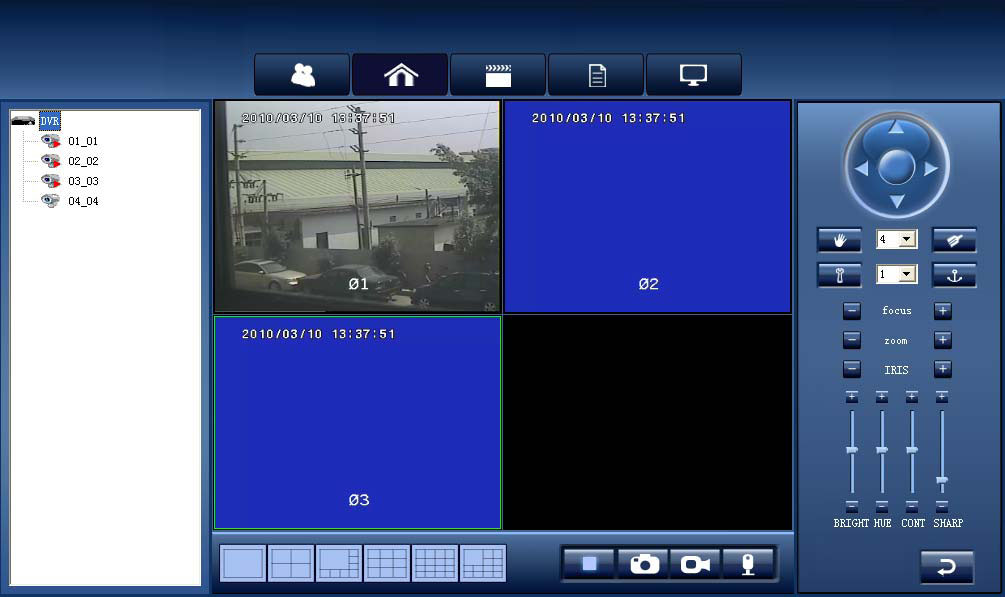
9. Enter the default login password 88888888, and then select a particular screen, double-click one camera icon on the left one, you can see the image. The picture is displayed as blue when do not install the camera , without double-click the camera icon on the screen is black . Shown as below:
10. The steps of using Client-side to login and access DVR set-up,please see attached action video.
Additional steps: 1. If you use the IP address in IE but could not land on the DVR, please use the ping command on the computer to checks whether the network connectivity; networks in good status means machine is no problem, if the network is not normal please re-check the machine settings.
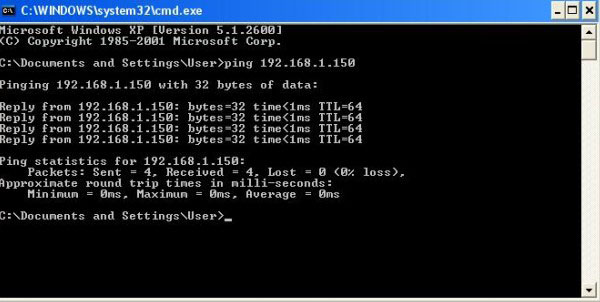
2. If the PING does not connect well, please check the network cable, there are 2 kinds: One is the cross-line and the other is a parallel line, respectively, try to use two kinds.
3. Check if the router has restricted the number (192.168.1.150), please replace the IP address with another and try.
